How to create Simple Fixtures
Step 1. Import Base CAD or Mesh
You start with the geometry for which you want to create a fixture. You can start with either a CAD or a Mesh, which can be imported using the Import Part or Import Mesh block.
Check out this support article for information on what file types nTop can import.
Step 2.
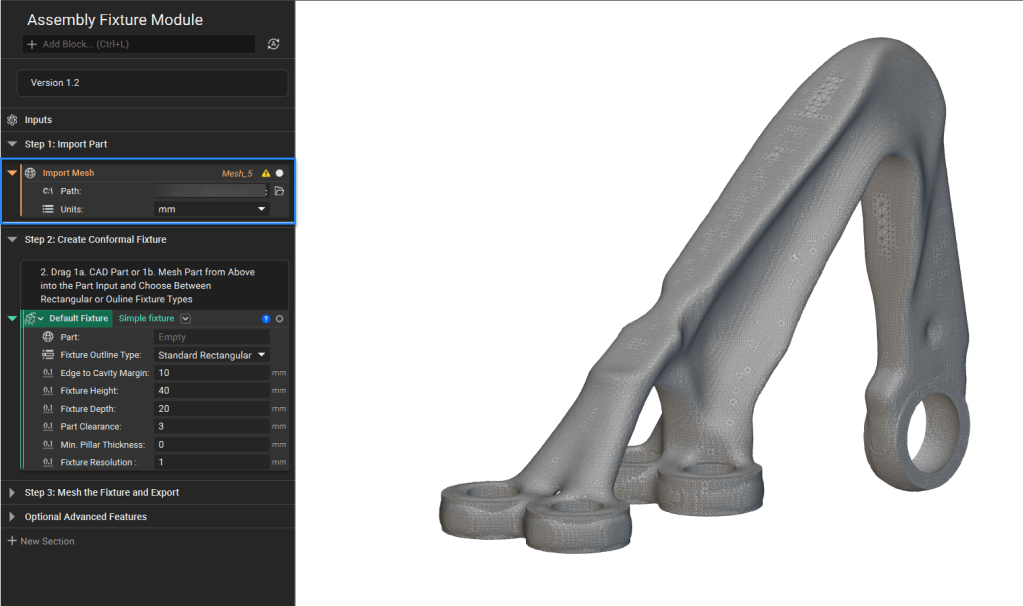
We will now create a Fixture using the Simple Fixture custom block that you can download from here. Once you have downloaded it, you can add it to your notebook by importing it.
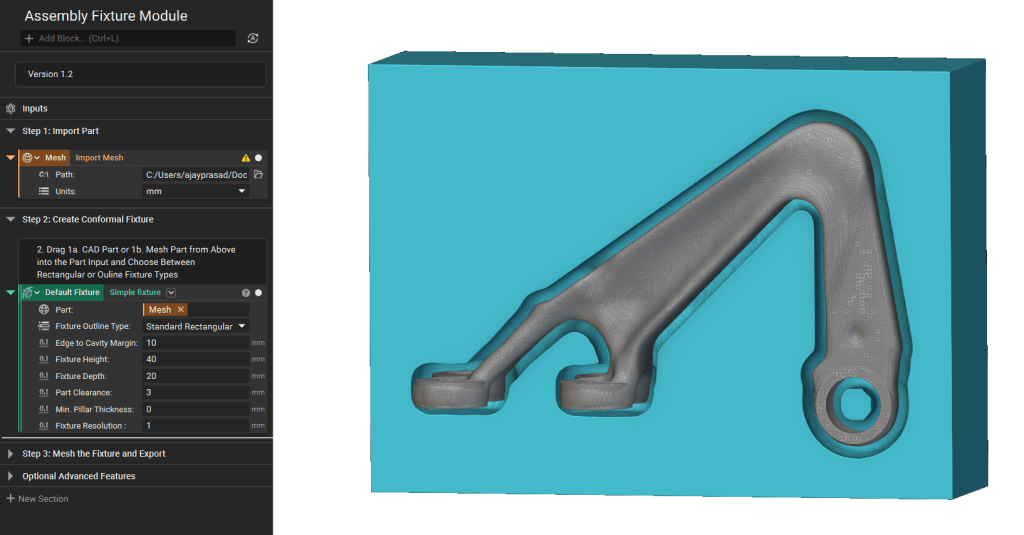
Drag and drop the imported geometry; we will use the imported mesh file in this case.
Step 3. Adjust inputs
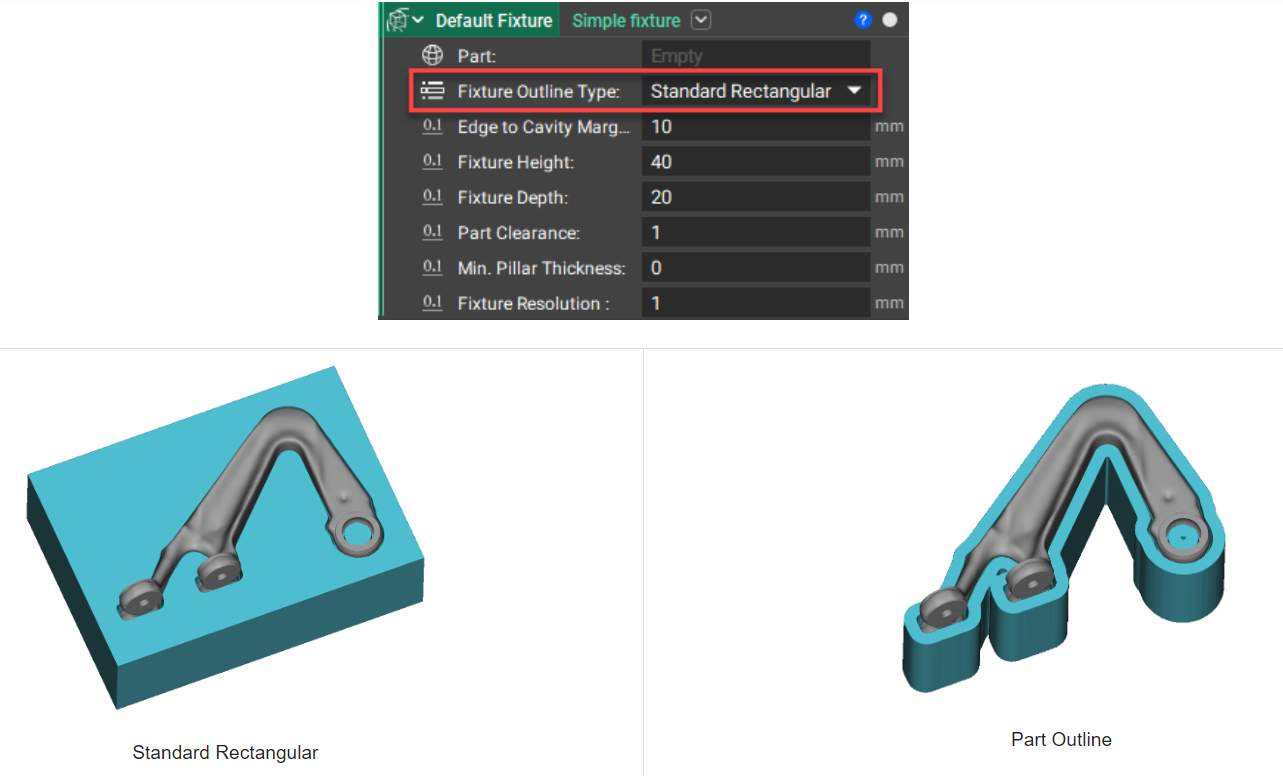
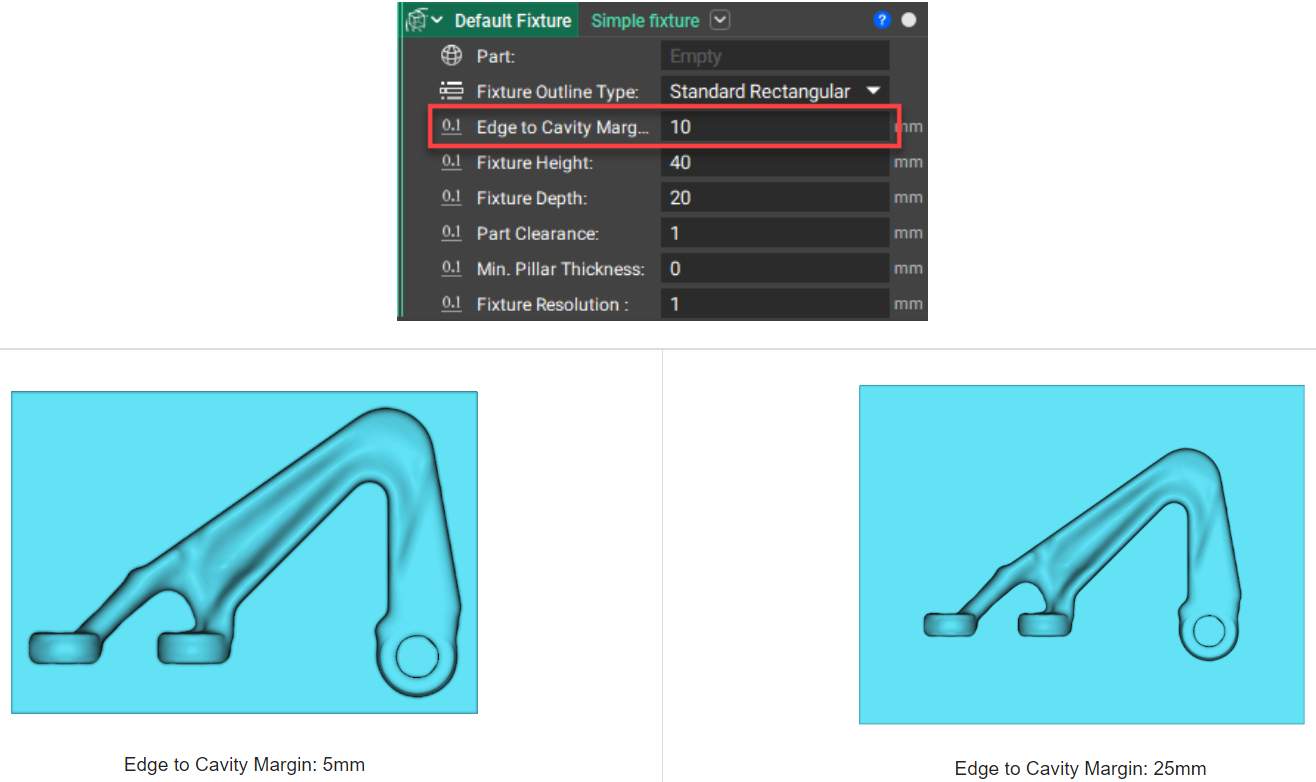
Choose between a rectangular outline or part outline shape to create the fixture design.
The offset distance between the cavity and the outer perimeter of the jig.
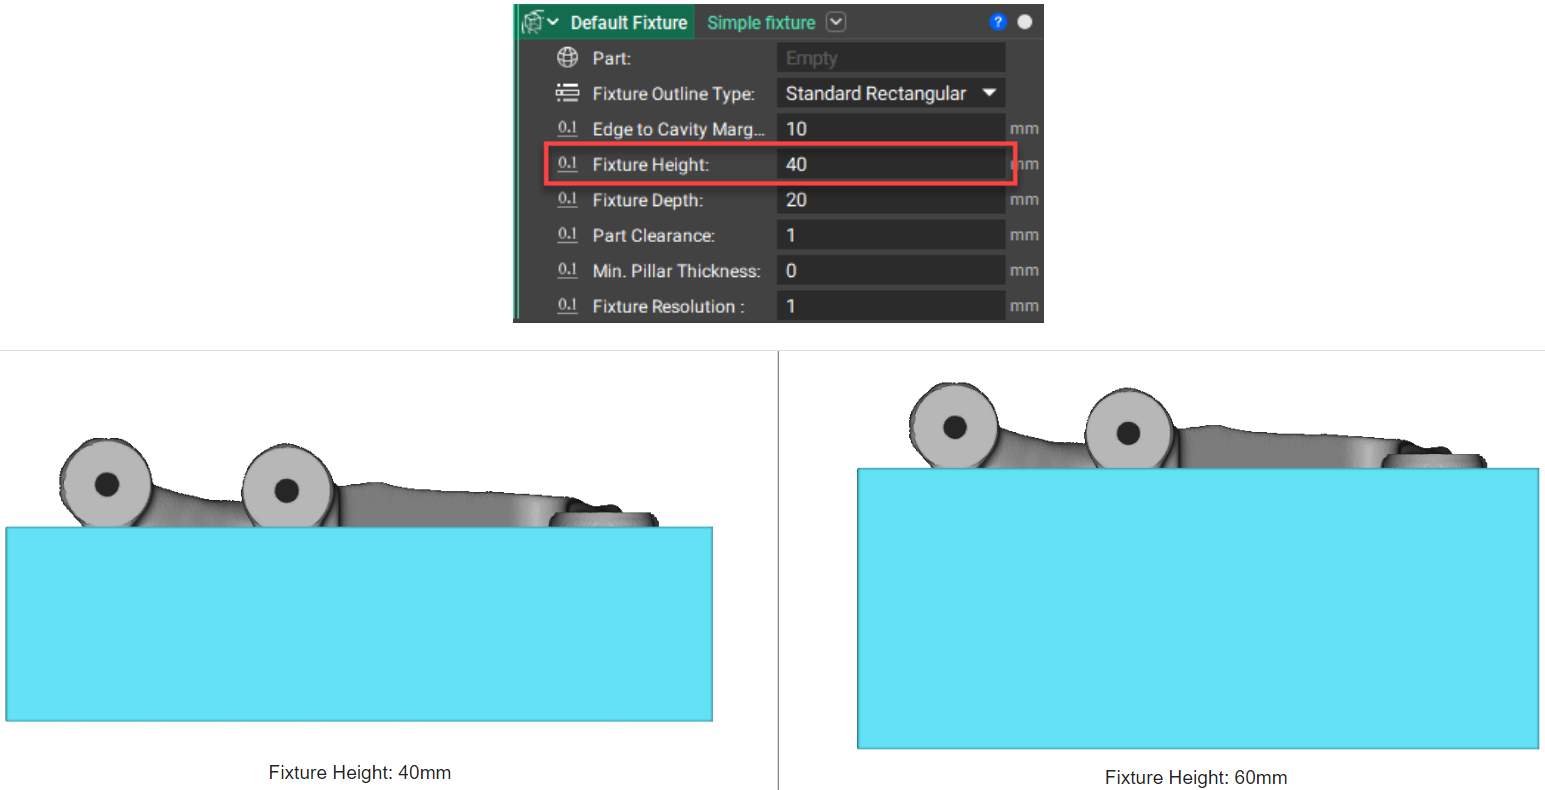
The total height of the fixture is measured from the maximum height and the minimum height of the object. Additional height is added to the fixture floor to maintain the same Fixture Depth.
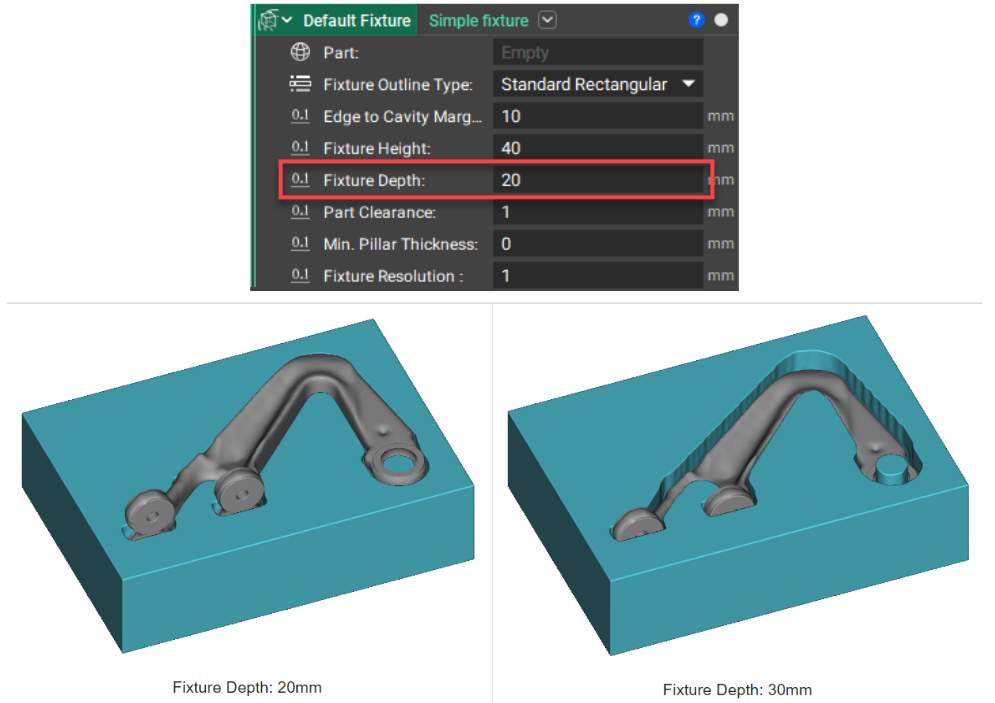
How deep the part sits in the fixture design space to create the jig. A larger fixture depth increases the depth of the resulting jig. Fixture depth should not exceed the total height of the input design.
The Part Clearance is the clearance distance between the input part and the fixture. The clearance value should not be greater than the cavity detail parameter.
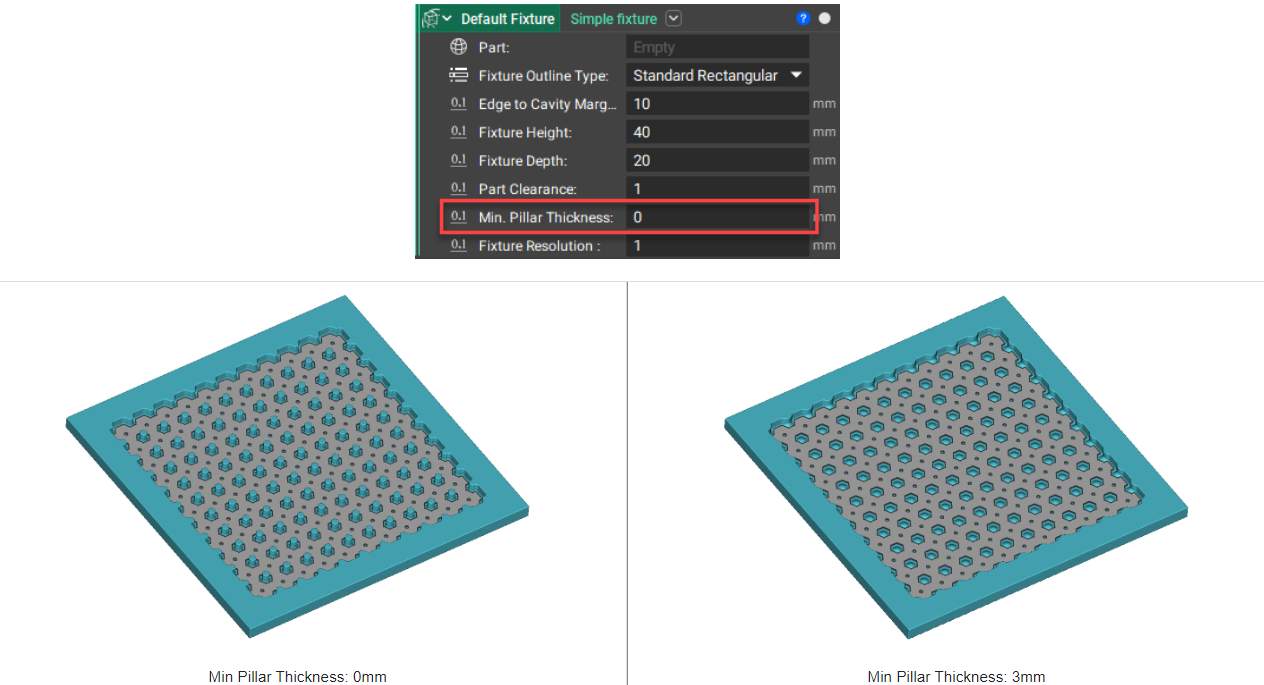
If the bottom of your part has holes or something similar, this parameter accounts for this to avoid creating pillars.
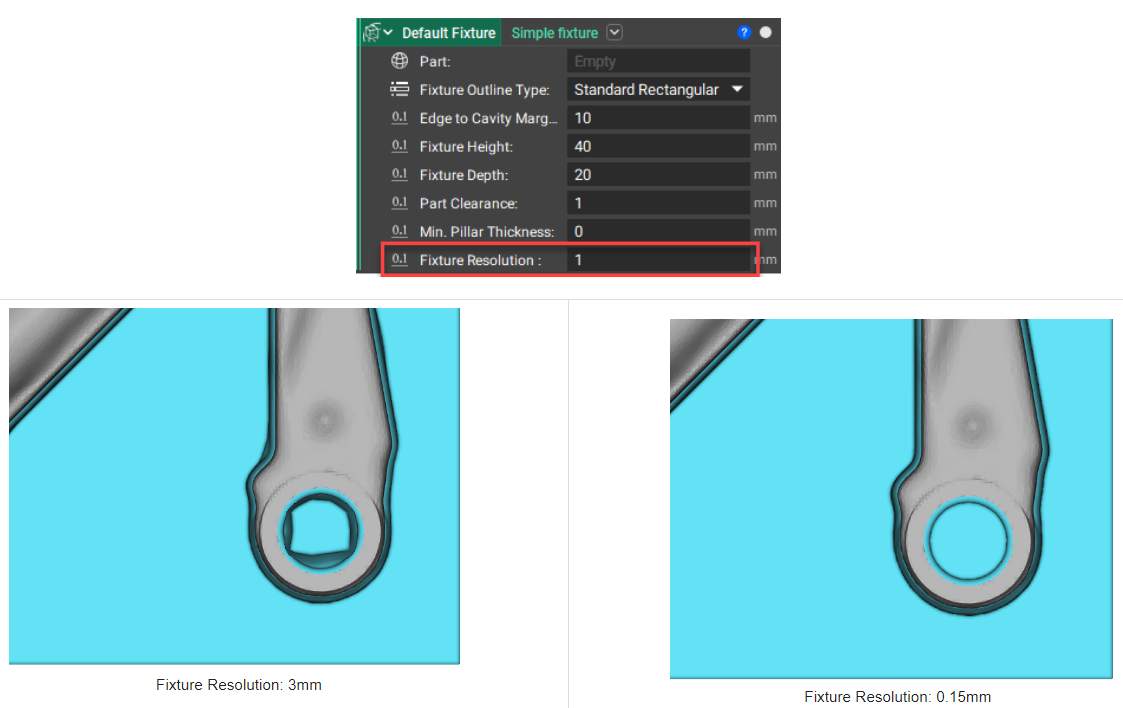
The level of detail you want to preserve in the cavity of the jig. A lower value increases the level of detail captured but is more computationally expensive. This value should be the minimum feature size of your part. The Cavity Detail should not exceed the clearance value of the part.