Remap Fields vs. Remap Body
To understand the difference between remapping a field and remapping a body, let’s look at a gyroid-latticed cube and look at how the Remap Scale Body block differs from the Remap Scale Field block.

Now that you are familiar with scaling, you can see how the gyroid cube is 3 times longer in x, 2 times longer in y, and the same scale in z.
Note how the Remap Scale Body and the Remap Scale Field outputs look identical.
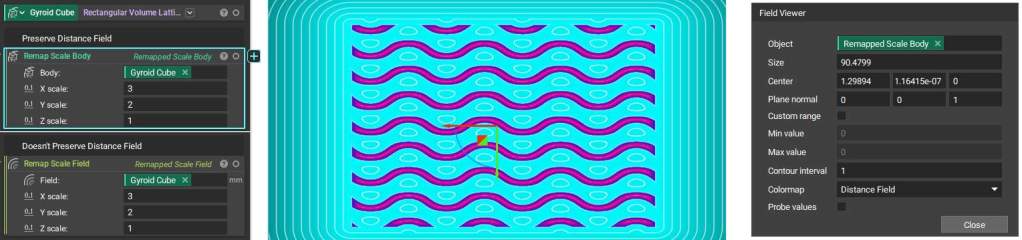
To go under the hood and better understand the difference, let’s hit ‘F’ to open the Field Viewer for each block. Set the ‘Contour interval’ to 1. Notice how the gyroid walls are defined clearly in the Remap Scale Body output.
Signed Distance Fields (SDFs), which are used in implicit bodies (like the Remap Scale Body block in green) and reference geometries (like points) capture how far away you are from the surface. Hit ‘Probe values’ and hover over the part. At the surface, the SDF returns 0; inside the body, the SDF is negative; and outside the body, the SDF is positive.
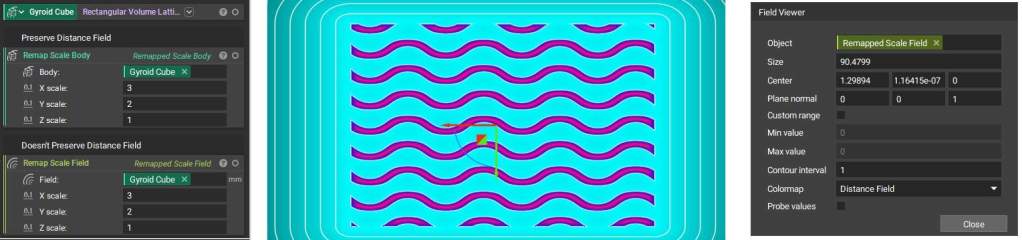
However, when you use a Remap Scale Field, you are not necessarily sure if the distance field is preserved (i.e. where the zero represents the walls), and the output implicit body looks defeatured in comparison. This highlights how SDF is not preserved here.
This difference occurs because the toolkit blocks for the Remap Scale Body, Remap Cylindrical Body, and Remap Spherical Body, all include a scaling step to return the rate of change to the original values. The scaling process looks different for each of these blocks, but each contains that scale factor that will rescale the field to show the correct SDF, as shown below.

Note: To view this toolkit block, right-click and Open or Export the block as described in our 230: Intro to Automation course.